Getting Started
This section explains how to install the project and later on which steps have to be done when you want to execute the program.
Installation
Requirements
We suggest to use Windows as a development system as the used HTC Vive is officially just supported on Windows. Nevertheless it’s possible to run the Unity project without the HTC Vive for debugging purposes. This is also possible with other operating systems like Mac OSX.
Part 1: Install Unity
The Xylophone Recording Project is developped and tested in Unity. Take a look at the ProjectSettings/ProjectVersion.txt file to see what Version of Unity is currently used for the Project. Any Versions later than this should be compatible with this project. Using earlier versions should be avoided, because it may cause “missing prefab” and other problems.
Specific Unity Versions can be downloaded here: Unity Download Archive
Select the correct version and download the installer. After downloading, run the installer and follow the instructions to install Unity.
Part 2: Setup HTC Vive and SteamVR
Follow the official SteamVR HTC Vive PRE installation Guide to set up HTC Vive and SteamVR.
Part 3: Clone the project from Github
Use the following command in Git Bash or your preffered command line to clone the Xylophone Recording repository from Github:
git clone https://github.com/Roboy/ss18_xylophone_recording.git
Part 4: Setup ROS
This is just one way of installing ROS for Roboy. There are probably more suited approaches which are more elegant. But this one worked for us. ROS can be installed on another computer then were Unity is installed.
Install ROS like described in the Roboy repository.
Change to the Roboy directory and checkout our branch of the roboy_communication repository:
cd path-to-Roboy/src/roboy_communication
git checkout ss18_xylophone_recording
If you just want to run our program you can move all the other submodules/folders inside src (everything except CMakeLists.txt and roboy_communication) to another folder outside src so that they won’t be built:
cd path-to-Roboy
mkdir donotbuild
mv src/common_utilities donotbuild
...
Build the project:
source devel/setup.bash
catkin_make
Starting the Program
Step 1: Launch ROSBridge Server
Before running the Unity Project launch the ROSBridge Server on a device which has ROS installed like this:
source path-to-Roboy/devel/setup.bash
roslaunch rosbridge_server rosbridge_websocket.launch
Step 2: Check for an available Midi Device
Check if you have any available Midi Devices. This can be done by using a Midi Management/Monitoring tool like Midi-OX (Windows). In Midi-OX use Options > Midi Devices to see the current Midi Devices available.
An Alternative for MacOSX would be MIDIMonitor.
Note down the Midi Device Number of your prefered Midi Output as you need it later on.
If you don’t have a local Midi Device you can use a loopback Driver like loopMIDI (Windows) for testing purposes. On MacOSX you can use the this guide to setup a loopback Driver.
If you want to send Midi over the network to another computer in an efficient manner check out the “Communication > Jack2 Network Setup” chapter as the setup for this is not trivial!
Step 3: Launch Unity
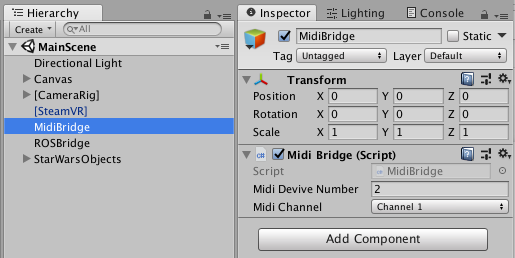
Launch Unity and check the GameObjects MidiBridge for the correct Midi Device Number which you wrote down earlier and your desired Midi Channel.
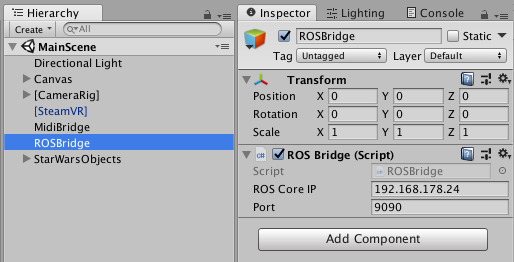
Check the GameObject ROSBridge for the correct ROS Core IP (computer where you started the ROSBridge Server) and Port.
Extra Softwares for Development
Install Blender
We use Blender to build some of the 3D models in our project. If you want to modify the models or build some new ones, you can download Blender here, run the downloaded installation program to install blender and then you are ready to go. You can find very good tutorials online. If you are new to blender, This could be a good start.